Why Mobile automation?
As the world is moving towards the more use of Mobile rather than using the desktop or laptop for any stuff like shopping, banking etc. For more information about mobile automation check here
How to automate Mobile app?
In today's world we need everything on mobile and the apps installed on device should be much more efficient to help us. Like you want to do shopping, so in this case the app should be responsive, with interactive UI's and should be able to handle the load of multiple users at same time. There are so many things which need to be taken care when you are automating an application. So in this we will consider functionality testing. We will consider dialer app of a smartphone, which is considered to be mostly used by user.
Basic concepts required for automation:
Before jumping directly to coding let us understand few concepts. I have considered Dialer app using page object model
So what exactly is Page Object in automation world? It is nothing but modulating our code page by page instead of writing everything in a single code. This way representation of code is easy to manage and easy to understand.
Appium basic concepts are required to be understood before moving further. You can go through here
Pre-requisite:
You need to install below setups on your system
Installation documents are available here
App for Automation:
We have choose Dialer app for the automation. We will basically automate an android platform app.
To automate any app in appium we have to first find appPackage and appActivity
So the question here is how to find the appPackage and appActivity of an application. There are two methods to figure out this
adb shell
shell@LS-5016:/ $dumpsys window windows | grep -E mCurrentFocus|mFocusedApp'
Inspecting element:
Once we have decided which app to test and automate, lets see how to automate same using appium. First thing is to launch the appium server which you halve already installed on your machine.There are two ways which you can inspect UI element
1. Using uiautomator
2. Using UI inspector available in appium
Inspecting element using uiautomator detail information is available here
Here we will see in detail about inspecting element using appium inspector.
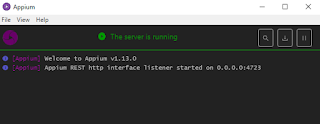
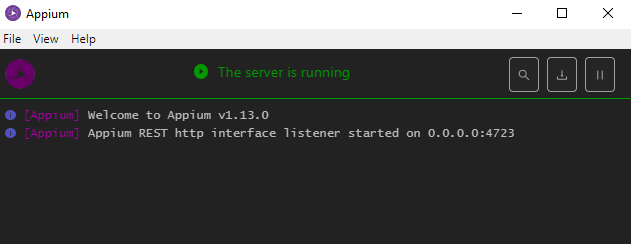
First step is to launch the appium server

Then we have to start the server
Step 2 is to start a new session. We need to click on file-> New session window
It will display a new window where we have to set the desired capabilities like as below

And click on Start session button
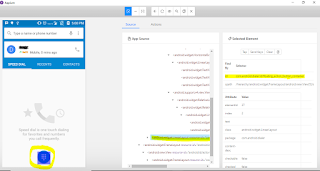 So here we could see different properties of UI element. For example
If if wish to click on highlighted area it will display
various actions performed on the element could be found here and various ways to identify elements could be found here
Automation code goes here:
So finally how to put them all together in a code.
webdriver.py
As the world is moving towards the more use of Mobile rather than using the desktop or laptop for any stuff like shopping, banking etc. For more information about mobile automation check here
How to automate Mobile app?
In today's world we need everything on mobile and the apps installed on device should be much more efficient to help us. Like you want to do shopping, so in this case the app should be responsive, with interactive UI's and should be able to handle the load of multiple users at same time. There are so many things which need to be taken care when you are automating an application. So in this we will consider functionality testing. We will consider dialer app of a smartphone, which is considered to be mostly used by user.
Basic concepts required for automation:
Before jumping directly to coding let us understand few concepts. I have considered Dialer app using page object model
So what exactly is Page Object in automation world? It is nothing but modulating our code page by page instead of writing everything in a single code. This way representation of code is easy to manage and easy to understand.
Appium basic concepts are required to be understood before moving further. You can go through here
Pre-requisite:
You need to install below setups on your system
- Python 2.7 (stable version)
- PyCharm Community Edition
- Appium standalone server
- Selenium
- Appium Client
Installation documents are available here
App for Automation:
We have choose Dialer app for the automation. We will basically automate an android platform app.
To automate any app in appium we have to first find appPackage and appActivity
So the question here is how to find the appPackage and appActivity of an application. There are two methods to figure out this
1. By using adb command
shell@LS-5016:/ $dumpsys window windows | grep -E mCurrentFocus|mFocusedApp'
2. By using aapt dump badging command
Detail about this could be found here
Once we have decided which app to test and automate, lets see how to automate same using appium. First thing is to launch the appium server which you halve already installed on your machine.There are two ways which you can inspect UI element
1. Using uiautomator
2. Using UI inspector available in appium
Inspecting element using uiautomator detail information is available here
Here we will see in detail about inspecting element using appium inspector.
First step is to launch the appium server

Then we have to start the server
It will display a new window where we have to set the desired capabilities like as below


If if wish to click on highlighted area it will display
com.android.dialer:id/floating_action_button_container
various actions performed on the element could be found here and various ways to identify elements could be found here
Automation code goes here:
So finally how to put them all together in a code.
webdriver.py
from appium import webdriver

class Driver:

    def __init__(self):

        desired_caps = {
            'platformName': 'android',
            'deviceName': 'LYF WIND7i',
            'appPackage': 'com.android.dialer',
            'appActivity': 'com.android.dialer.DialtactsActivity',
}
self.instance = webdriver.Remote("http://localhost:4723/wd/hub",desired_caps)
In this .py file we are mentioning the desired capabilities required for our test.
dialer_screen.py
from appium.webdriver.common.mobileby import MobileBy
from selenium.webdriver.support.wait import WebDriverWait
from selenium.webdriver.support import expected_conditions as e

class DialerScreen:

    def __init__(self, driver):
        self.driver = driver
        self.floating_action_button = WebDriverWait(self.driver.instance, 5).
                                     until(e.visibility_of_element_located
                                     ((MobileBy.ID, "com.android.dialer:id/
                                     floating_action_button")))

    def dial_number(self):
        # Dial a number
        dial_digit_buttons = self.driver.instance.find_element(MobileBy.ID ,
                                  "com.android.dialer:id/digits")
        dial_digit_buttons.send_keys('number')

    def click_call_button(self):
        press_call_button = self.driver.instance.find_element(MobileBy.ID,
                        "com.android.dialer:id/dialpad_floating_action_button")
        press_call_button.click()

    def click_floating_action_button(self):
        floating_action_button = self.driver.instance.find_element(MobileBy.ID,
                                "com.android.dialer:id/floating_action_button")
        floating_action_button.click()

    def click_end_call_button(self):
        press_end_call_button = self.driver.instance.find_element(MobileBy.ID,
                      "com.android.dialer:id/floating_end_call_action_button")

        press_end_call_button.click()
And finally comes our test execution script. Call_from_dialer.py
import unittest
from webdriver.webdriver import Driver
from apps.dialer.dialer_screen import DialerScreen

class DialerTestCases(unittest.TestCase):

    def setUp(self):
        self.driver = Driver()

    def test_dialer_launches(self):
        dialer = DialerScreen(self.driver)
        dialer.click_floating_action_button()
        dialer.dial_number()
        dialer.click_call_button()
        from time import sleep
        sleep(10)
        dialer.click_end_call_button()

     def tearDown(self):
        self.driver.instance.quit()

if __name__ == '__main__':
    suite = unittest.TestLoader().loadTestsFromTestCase(DialerTestCases)
    unittest.TextTestRunner(verbosity=2).run(suite)
So here you could see that,
- def setUp(self) this method invokes the desired capabilities before we could run the actual test script.
- test_dialer_launches(self) this method actual have the test steps which need to be carried on in order to execute it.
- Finally the tearDown(self) method is to quit from the test.
The file structure would look like

To run test simply right click and select run unittest for Call_from_dialer.py


This comment has been removed by a blog administrator.
ReplyDeleteYes, Perfect details, Good Job...
ReplyDeleteI think from 2020, mobile application automation testing will be on the top. and Appium also favorite tool of testers ...
It’s very informative and you are obviously very knowledgeable in this area. You have opened my eyes to varying views on this topic with interesting and solid content. mobile detailing
ReplyDeleteThis really is my first time i visit here. I discovered so many entertaining stuff in your blog, especially its discussion. From a great deal of comments in your articles, I guess I am not alone having all of the leisure here! Maintain the superb work. It is very useful who is looking for top software testing companies
ReplyDelete